Classic Quilt Blocks have been sewn for centuries, are easy to recognise and are every quilters favorite. Let's celebrate these gorgeous blocks and add them to our quilting projects!

Welcome to Week Two of my Basket Classic Quilt Blocks series. It's tutorial week and today we're going to sew one of these gorgeous Basket blocks together - YAY!
I hope you had some time to plan your block using last week's colouring sheet and pull some fabrics so you're ready to sew along with me!
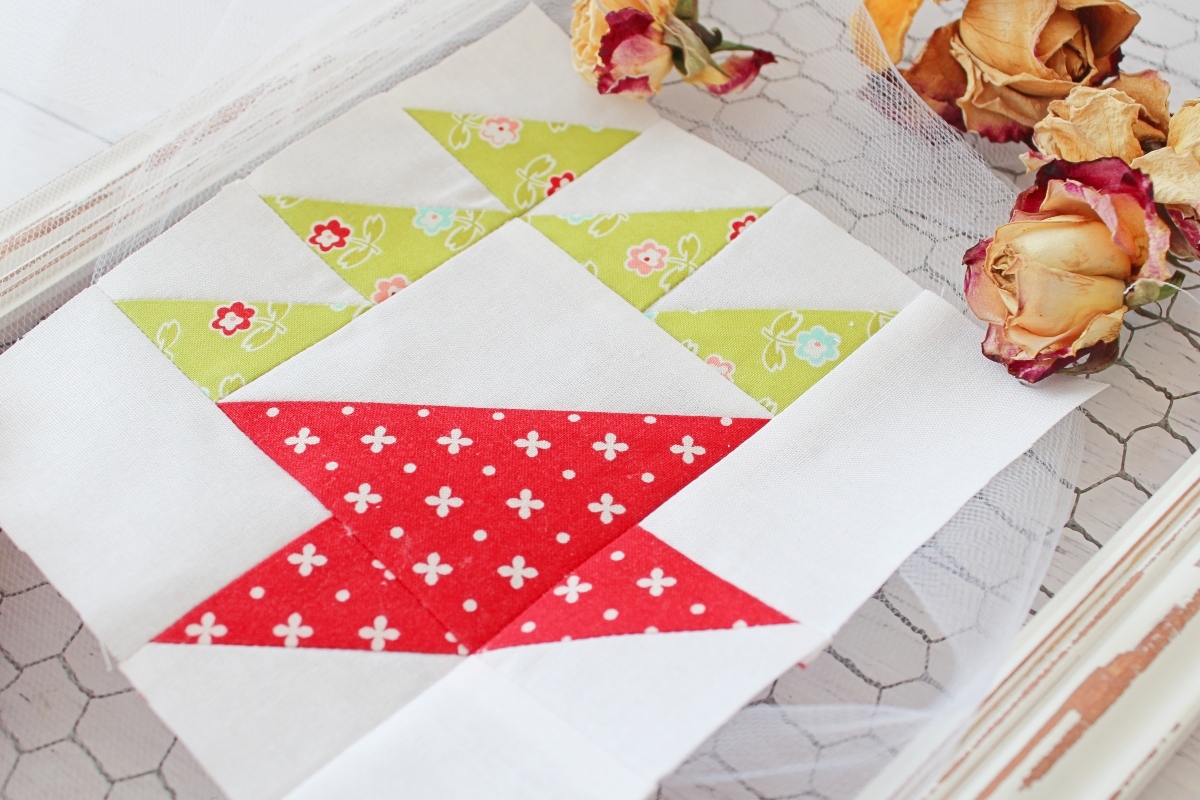
In this step by step tutorial we'll be sewing a 6" (finished) Basket block, and I'm using the colour palette as shown in the photo above - crisp white for the background, and some Bonnie and Camille fabrics for the basket.
At the end of the tutorial, I've provided a Cutting Chart for six sizes of the block, so you can use them for future projects without having to do all the math.
Are you ready? Let's sew:

From your background fabric cut:
- 4 x 2 1/2" squares cut diagonally to yield 8 triangles (A) - one triangle is not required so save this for future blocks.
- 1 x 4" square cut diagonally to yield 2 triangles (B) - one triangle is not required so save this for future blocks.
- 2 x 2" x 3 1/2" rectangles (C)
- 1 x 2" square (D)
From red print fabric cut:
- 1 x 4" square cut diagonally to yield 2 triangles (E) - one triangle is not required so save this for future blocks.
- 1 x 2 1/2" square cut diagonally to yield 2 triangles (F)
From green print fabric cut:
- 3 x 2 1/2" squares cut diagonally to yield 6 triangles (G) - one triangle is not required so save this for future blocks.

- Sew a white background (A) triangle to each of the two red (F) triangles and each of the five green (G) triangles, along the long sides and pressing seams towards the print fabrics.
- Using the centre seam as a guide, carefully trim each HST unit to 2" square.

- Sew the white (B) triangle to the red (E) triangle, along the long side and pressing the seam towards the red triangle.
- Using the centre seam as a guide, carefully trim the HST unit to 3 1/2" square.

- Sew together two of the green/white HST units, as shown in the photo, pressing the seam towards the green fabric. Sew this unit to the top of the red/white HST, pressing seam towards the red/white HST.
- Sew together the remaining three green/white HST units, as shown in the photo, pressing the seams towards the green fabric. Sew this unit to the left side of the red/white HST, pressing seam towards the green/white HST's.

- At this stage, your block should look like this and measure 5" square.

- Sew a white (C) rectangle to one of the red/white HST units as shown in the photo, pressing the seam towards the red triangle.
- Sew this unit to the bottom of the block, pressing the seam towards the large red triangle.

- Sew together the remaining white (C) rectangle, the remaining red/white HST and the white (D) square as shown in the photo, pressing the seams in the downward direction for nesting.
- Carefully matching all seams, sew this unit to the right hand side of the block, pressing the seam away from the block.

And that's it! One gorgeous Basket block which should measure 6 1/2" square to use in future projects!
Did you enjoy sewing this block? I hope you want to sew more now you've given this one a try.
To make it easy for you, I've provided a Cutting Chart with six sizes of the Basket block, so you don't have to worry about all the math. I've included the HST trimming sizes as well for easy reference.
Simply click on the link to download and print your Cutting Chart or right click on the photo below and save it to your computer:


Next week I'll show you some variations of this block and share my top four favorite Basket quilt patterns. There's some beautiful quilts and blocks in Week Three's post - you're going to be inspired to sew your own quilt!
I also have a little bonus for you - I'm re-releasing an old Basket Quilt pattern of mine on Monday and there's a huge discount code for my blog and Classic Quilt Blocks readers. Keep an eye out for that next week and sew yourself a lovely 20" square quilt for Easter.
Thanks for sewing along with me today! Tutorial week is always fun, and I hope you enjoyed it too!

Happy quilting :)


Thanks for posting this. Great instructions. Made two 6-inch blocks so far.
ReplyDeleteThat's wonderful! I'm thrilled you made some! Thanks for sewing with me :)
DeleteThank you very much. I enjoy every post you write. Hugs.
ReplyDeleteOh you're so sweet! I'm thrilled you enjoy them :)
Delete