Let's go back to basics and discuss hand dyeing your own fabrics! In this three-part Quilting 101 series I'll share everything I've learnt so far and show you my results!
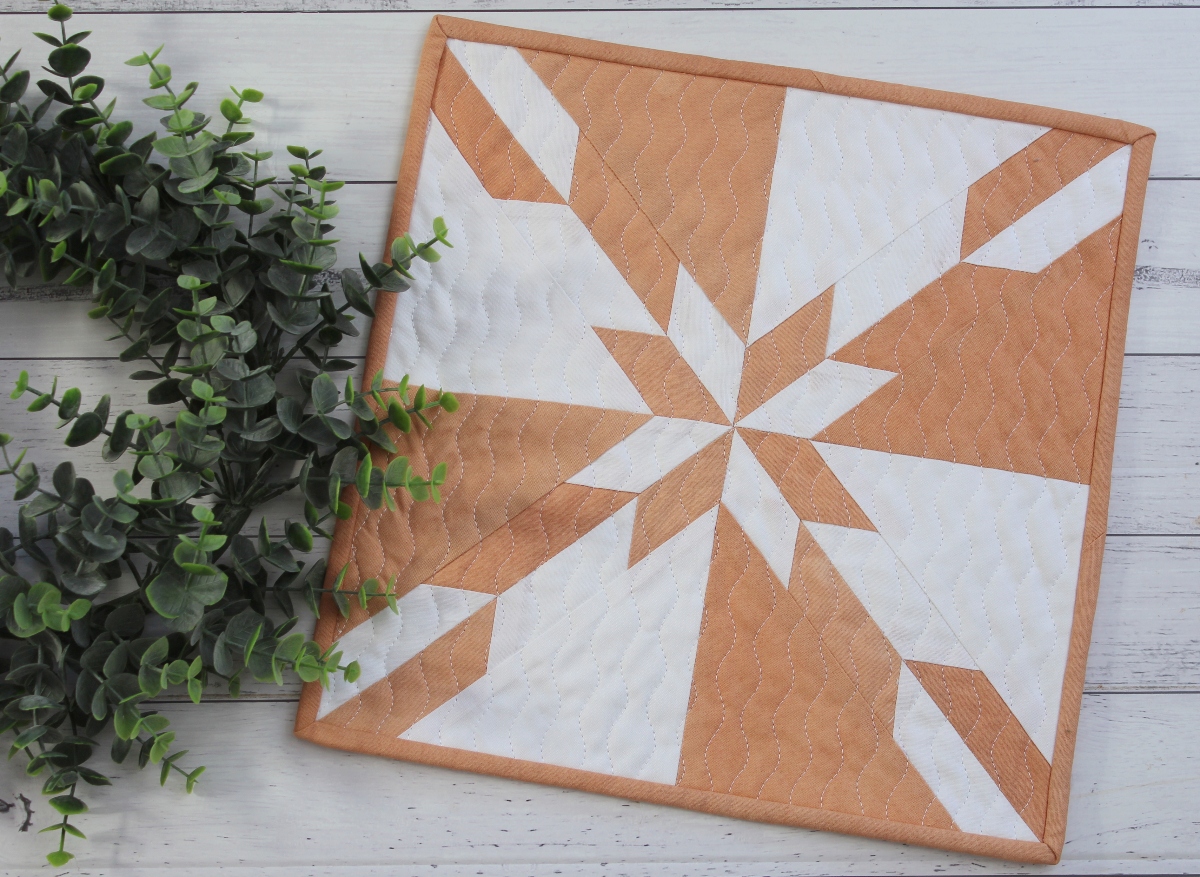
In today's post we'll discuss how to make natural dyes and dye your own fabrics. I'll also show you my results from an onion skin dye and share a hand dyed version of this month's mini quilt Diana.
I've spent weeks researching this topic and I'll continue to learn and experiment with natural dyes as part of my quilting journey.
There's something so amazing about sewing with fabrics you played a part in creating and I'm eager to learn more and give my quilts fabulous hues of natural colour.
Let's dye some fabric:
Preparation
First and foremost is fabric preparation and we talked about that in Part One. Your fabric needs to be washed or scoured ready to accept the fabric dye or mordant.
We talked about Mordants and Tannins in Part Two so if you're using a dye that doesn't contain strong natural tannins you will need to mordant your fabric.
Next step is gathering your supplies, including the ingredients you've choose for your natural dye.
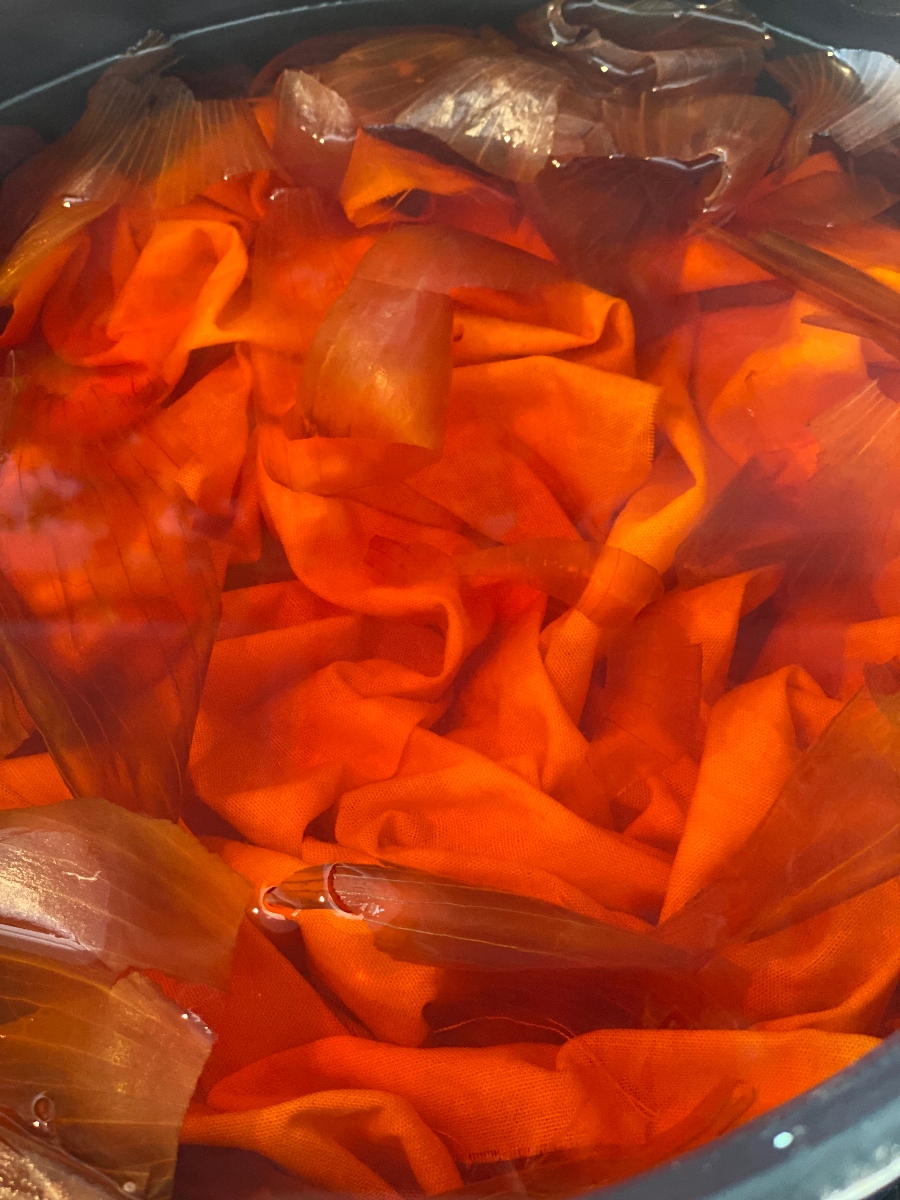
For my fabric, I used a white quilting cotton which I scoured, and I opted for onion skins as my natural dye which meant a mordant wasn't required.
Let's Make Fabric Dye
- The ratio for fabric dye is 1 part ingredient to 2 parts water - I used 1 cup of onion skins and 2 cups water.
- Add your ingredients and water to a stainless-steel pot, bring to the boil and then simmer for around an hour on a camp oven (outdoors) or stove (well ventilated), or until you achieve the colour you envisioned. It's fabulous to watch and I was happy with the colour after an hour.
- You can strain the dye once it's reach the colour you desire or leave the ingredients in the dye bath while you dye your fabric - I found no evidence of either method being the most effective.
- Fabric dyes can be stored in glass jars with a screw top. Ensure you label them clearly and keep them safely out of reach.
Dyeing the Fabric
- Place your prepared fabric in the dye bath and gently bring to boil, then simmer for around an hour. You can stir it occasionally but ensure the fabric stays fully immersed in the dye bath.
- If the colour isn't as intense as you'd like, you can turn off the heat and leave the fabric to dye longer, even overnight.
- When you've reached the colour you'd envisioned, remove the fabric and rinse with cold water. There will be some dye run as excess dye is removed. Rinse until the water runs clear.
- Dry the fabric on a clothes airer or a clothesline away from direct sunlight.
- Your excess dye can be strained and saved for other fabrics but be aware the colour will be less intense the next time you use it.
My Results
And here's my hand dyed fabric!
I love the rich earthy colour and there is some variation or mottling, but I'm embracing it.
The whole process was so much fun, from saving the onion skins to seeing the fabric emerge from the pot in a wonderful new colour. Very satisfying and very easy!
Now let's sew with this hand dyed fabric.
Diana in Hand Dyed Fabrics
I used my hand dyed fabric to recreate this month's mini quilt Diana and I think I feel more emotionally connected to the version because I was more hands on with its creation.
The colour variations in the fabric don't bother me and I'm extremely proud of what I achieved with a few onion skins, a pot of water and the urge to be creative.
The hand dyed fabric was easy to work with, but I did notice a slight smell while pressing with a hot iron - perhaps I didn't rinse the fabric enough or it's something that we must be prepared for.
I still have so much to learn about dyeing my own fabrics, but the success of this project has given me the confidence to keep trying and create my own fabric colours. It's added another layer to my quilting journey and exploring the possibilities will be very rewarding.
Thoughts & Conclusions
Image if you will, a beautiful sunny autumn day, the grandkids and their mumma were here for a visit, and we decided that it was time to use my bag of onion skins and dye my own fabric.
The whole process was so much fun and while the little ones were just excited to be playing outdoors in the garden, Madeline and I were quite invested in the outcome of this experiment. Watching the colour of the dye intensify was exciting, and it was so satisfying when I pulled out the dyed fabric - it was a WOW moment! I did get a smile from Miss Iris when I showed her the colour, but to be fair she was happy to be outside playing in her pretty butterfly gumboots! ;)
The rich earthy colour was exactly what I was hoping for and there were some variations in the intensity, but I embraced the imperfections, and I was very excited to use it in another version of the Diana Mini Quilt.
What I Learnt
- Because I wasn't sure if fabric dyeing was something I wanted to pursue or whether it was just something I wanted to try, I used utensils I had in the shed, and my old pot was quite small. I wasn't ready to invest in new equipment or source mordants online at this point.
- I think the variations in colour was caused from my pot being too small and the fabric not being fully immersed in the dye bath all the time.
- Keep your vision in mind when preparing your dye. If you want an intense colour, add more ingredients. If you want a pastel shade, add less or add an acid to the dye like vinegar to modify the intensity of the colour.
- Nothing is guaranteed or perfect, so let go of expectations and enjoy the process - you're learning a new skill and that's amazing!
- Patience - I'm impatient when I'm waiting to see the final result of any project. I had to stop poking and checking the fabric because I caused air pockets and couldn't get the fabric back under the dye bath. Next time I'll trust the process and be patient.
- This whole process is fun and satisfying and you will see more hand dyed fabrics on Threadbare Creations in the future :)
I hope you've enjoyed this three-part Quilting 101 series on natural dyes and dyeing your own fabrics.
I've enjoyed putting all of this information together and having it here on the blog is a wonderful resource for you but also for me - my notes and thoughts can be chaotic, but here they are all organised!
If you are an experienced hand dyer and you can add to the conversation or share your wisdom, please do in the comments. I'd appreciate your insight and you might inspire someone else to enjoy your craft!
PIN FOR LATER:
Happy quilting :)


.png)


No comments
I hope you enjoyed your visit to my blog. I love hearing from you so thank you for taking the time to leave me a message. 😊