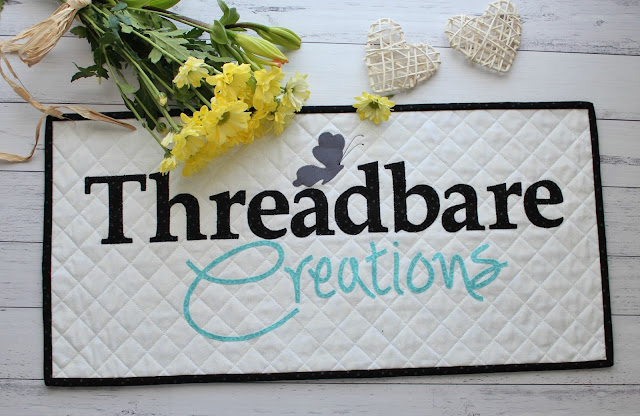
Tada! Now this was a fun little quilt to make and very close to my heart ♥. I had purchased some MDF letters to paint and spell CREATE but I'm so glad I decided to go with this mini instead.
As it was quick and easy to make, I thought I'd share a basic tutorial of my process so you can make something similar for yourself, maybe your own blog or business name. Its also a great way to add some lettering to your quilts, giving them that personal touch.
The first step is prepping the applique on your computer. Open a new file in a publishing program such as Word or Publishing. Set the page orientation to landscape and then chose WordArt. I have a tonne of fonts on file because I'm kinda addicted to them and they are great for adding unique text to photos or patterns. Most fonts are free for personal use but adhere to licence agreements if like me, you are using them for business. I decided to go with the same fonts as my logo:
For Threadbare I used Palatino Linotype (free download HERE) and I set the letter size to 300. Once your type in your letters, you can edit them to remove the default fill and shading and also change the thickness of the outline if you like. You can also flip their orientation so they are reversed and ready to trace for applique. Alternatively, I just flipped the printed pages and traced the letters onto vliesofix using my light box.
Creations is the Simply Glamorous font (free download HERE) and I sized this one at 250 to match how it appears on my logo. Its fun to mix different fonts and sizes, so play around until to you find what is visually appealing to you. The butterfly was mine and I sized it to suit but you can also find lots of free graphics to add to projects by doing a quick Google search.
Once my pieces were cut out, positioned and then fused to my background fabric (11 1/2" x 24 1/2"), it was time to applique. Due to the size/thickness of the fonts I chose two different methods to secure them. I machine appliqued the Threadbare using a blanket stitch (I have a quick tutorial HERE) but you could also stitch them by hand if you like.
I used raw edge applique for the Creations and it was actually the first time I had tried this method. It probably wasn't smart to learn on something with so many curves but it really is super simple and it worked perfectly. You can find a great tutorial HERE to help you.
I quilted my mini with some simple cross hatching. From the centre, I marked one line in each direction with a hera marker and then attached my seam guide to quilt the rest at 1" intervals. There was a lot of stopping, starting and thread burying because I didn't want to quilt over the lettering, but it was so worth all the effort and I love how soft and elegant it makes the quilt look.
I added the butterfly antennae with my machine after it was quilted and how cute are those securing stitches? They finish them off realistically with little club tips :)
I'm so happy with my new mini quilt and its hanging proudly on my wall. I'll show you some pictures of it in position next week when I give you a little tour of Threadbare HQ :)
Just before I go, I did buy a new machine and for those who asked (and I'm sorry I haven't replied), I brought a Brother VQ3000. Navigating machines and brands can be very confusing and daunting when you're thinking about buying a new machine. My advice is to listen to your salesperson, be clear with your needs for the machine, narrow it down to a few possibilities and then research, research, research! I'll tell you more about why this machine is perfect for me when I share my sewing room post and you get to see him (yes its a him and his name is Beau) :)
Until then, happy sewing :)


Rose your new sign looks super! Love the lettering and the creativity, I am sure you smile every time you go into your sewing room and see your quilted sign!
ReplyDeleteThis looks great! I like the addition of the butterfly, and the two different letter styles. What fun!
ReplyDelete