Classic Quilt Blocks have been sewn for centuries, are easy to recognise and are every quilter's favorite. Let's add these gorgeous blocks to our quilting projects!

Welcome to Week Three of my Economy block Classic Quilt Blocks series. In today's post, I want to show you how important this block is in quilt design and give you some examples of it in action.
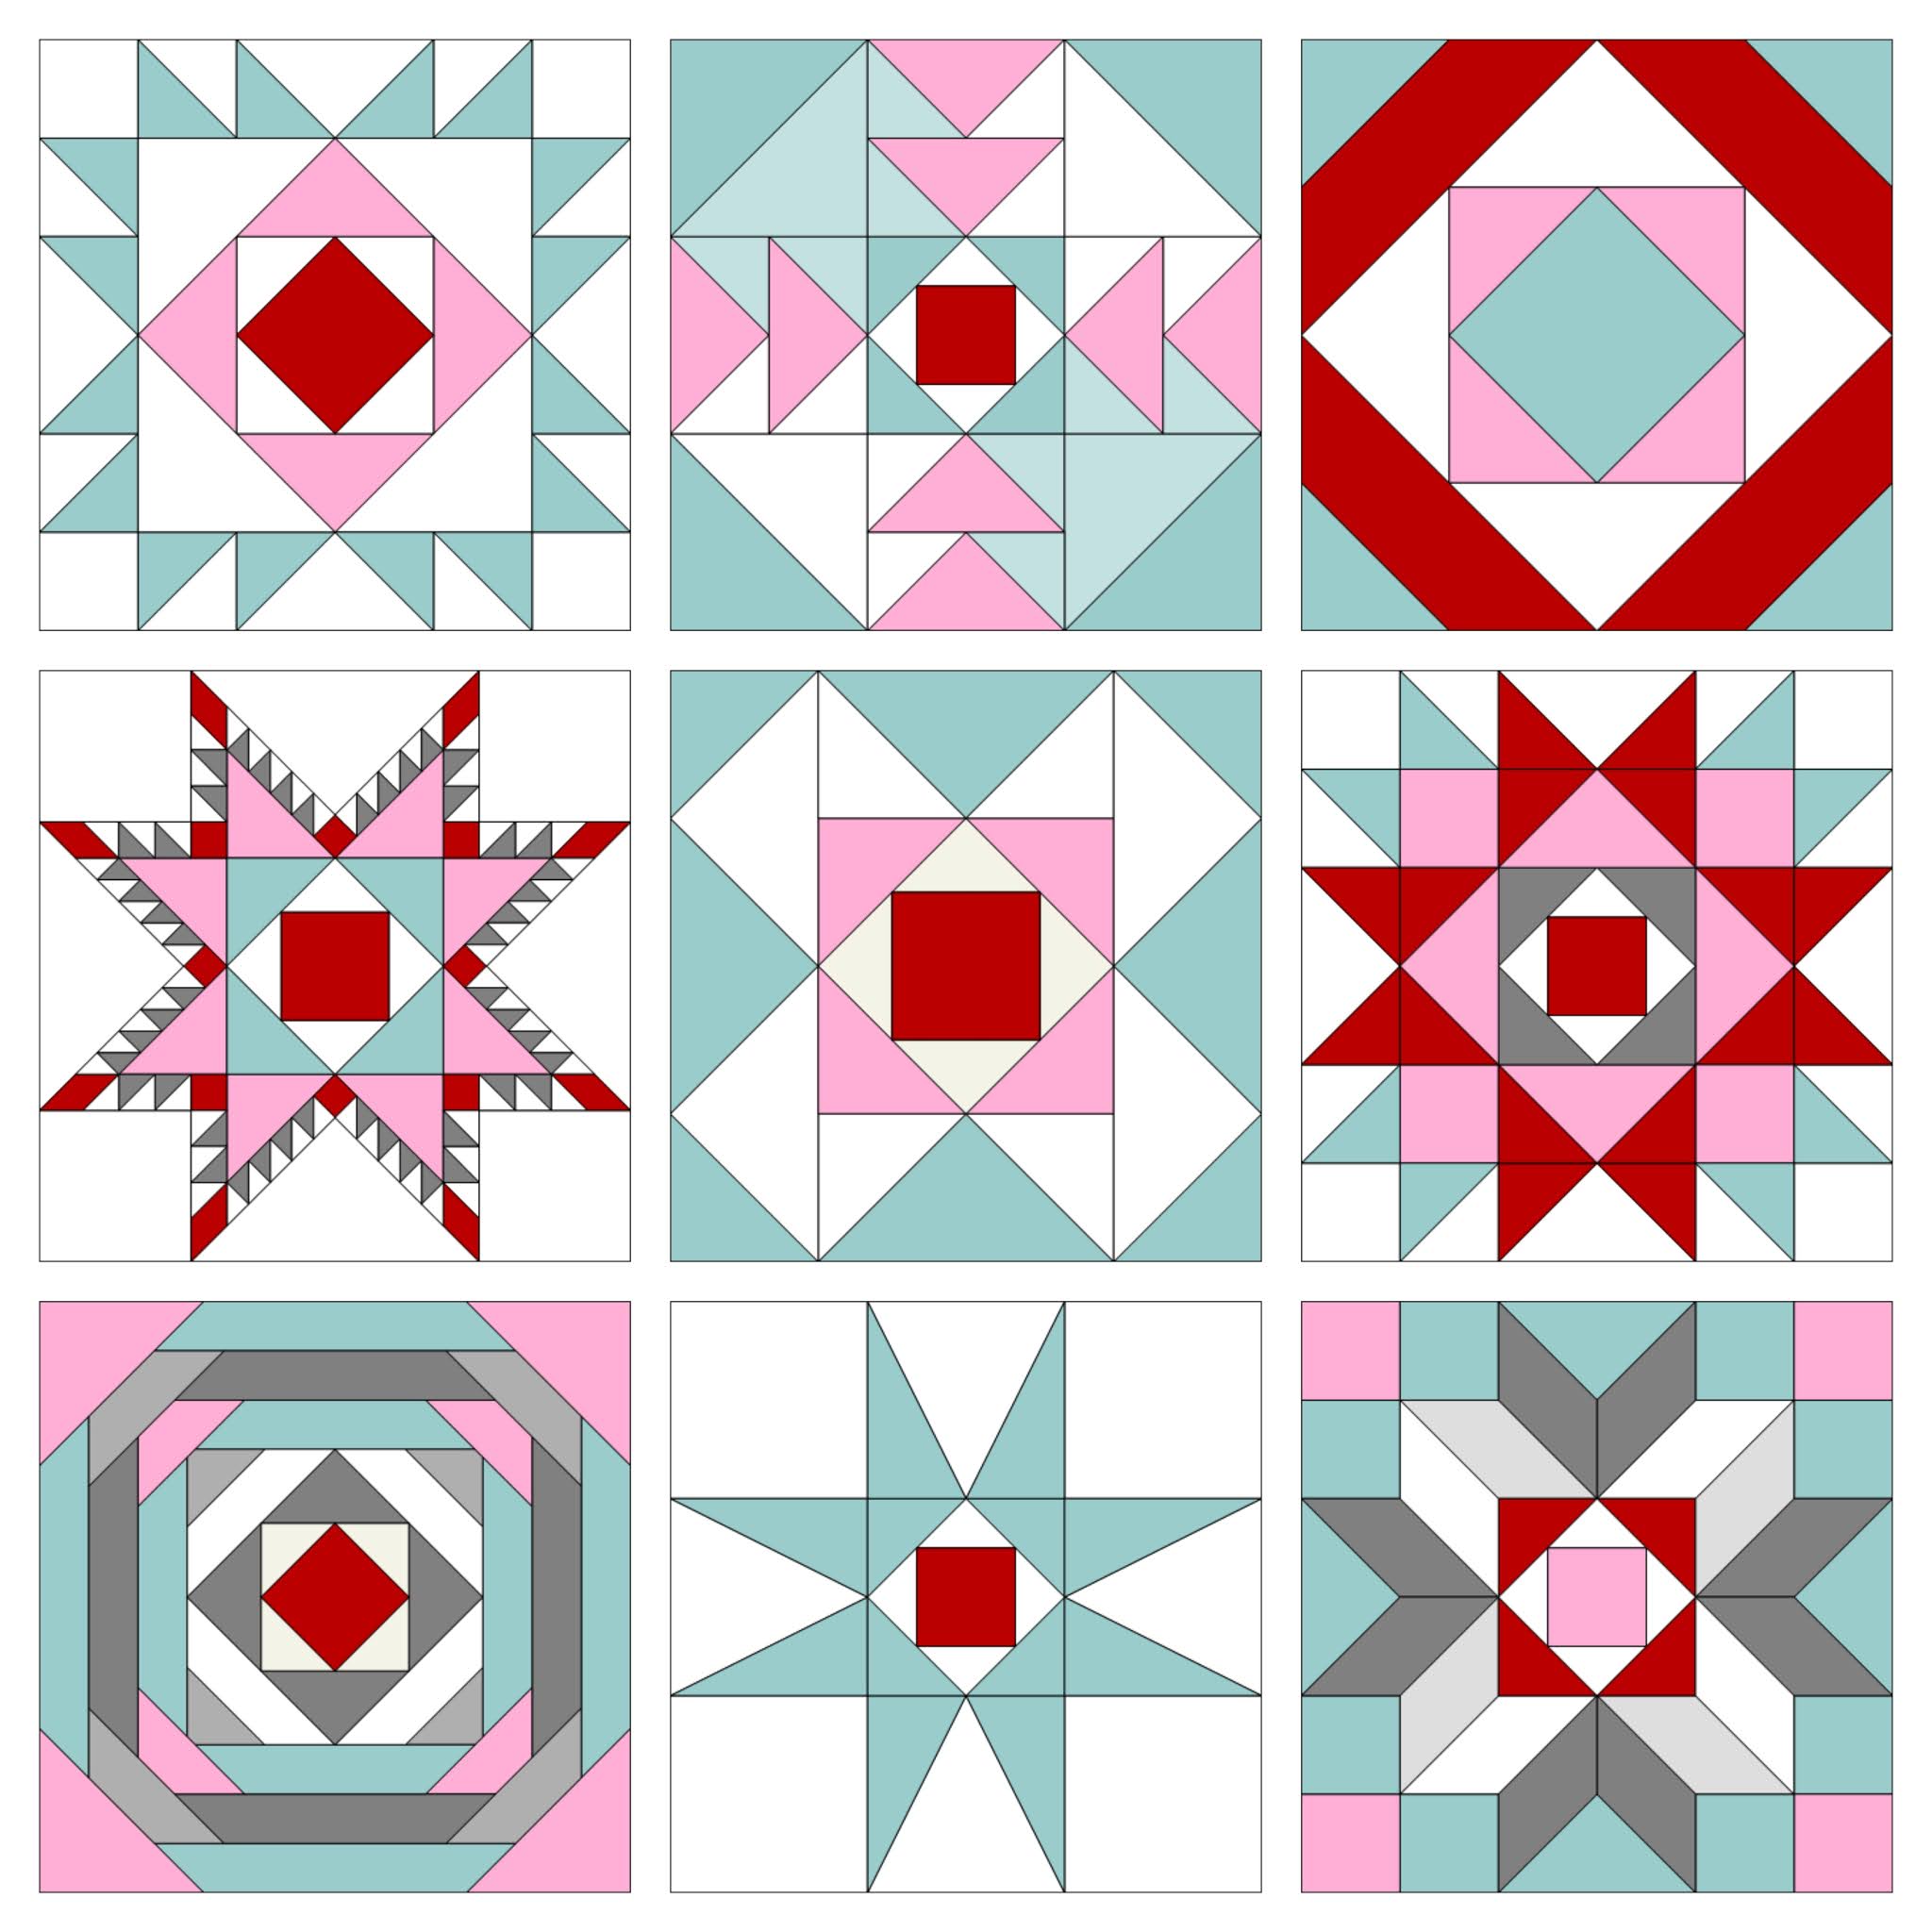
One of the reasons I started this series and included Cutting Charts in the tutorials, was to give you the confidence to mix and match blocks to create unique and wonderful designs. When you add a nine patch, economy block or a pretty pinwheel etc. to a block design, you elevate it to a whole new level and create something special for your quilt or project.

Playing with block design is fun, but it doesn't always work with every block. The size of the finished block can limit what you add, and sometimes they shine perfectly just as they are.
Smaller blocks, like (3"- 6") are compact and have enough detail, so adding to them makes them fiddly and everything gets a bit wonky. Larger blocks (8" +) have wide open spaces that benefit from little tweaks, adding more visual interest, and a chance to inject more colour.
Let's have a look at some of the previous Classic Quilt Blocks and see how they work with the Economy block.

First up is the gorgeous Churn Dash - stunning on it's own and even sweeter with the added Economy block centre. In a quilt layout, this simple tweak will add more colour to the design and the eye is drawn to the centre of each block making those Churn Dash's shine.
As an example, use my Churn Dash Cutting Chart for a 12" (finished) block and replace the background (C) square with a 4" (finished) Economy block from last week's Cutting Chart. Super easy and super cute!

Doesn't the Economy block make the Sawtooth block come alive? It adds more depth to the star, and it fills up that large blank space with more colour and detail.
As an example, use the Sawtooth Star Cutting Chart for a 8" (finished) block, and replace the print (A) square for a 4" (finished) Economy block using last week's Cutting Chart.

This Friendship Star and Economy block combination gives me all the feels. It's a match made in heaven and they work so perfectly together. This block is quite simple, so it benefits from the small tweak, and you could get all fancy and fussy cut fabrics for those centres - so fun!
As an example, use the Friendship Star Cutting Chart for a 12" (finished) block and replace the print (C) square for a 4" (finished) Economy block using last week's Cutting Chart.

It also works well with last month's Ohio Star block. It adds wonderful depth to the block, and you're drawn into that centre, plus it blends perfectly with the shapes of the star.
As an example, use the Ohio Star Cutting Chart for a 18" (finished) block and replace the print (C) square with a 6" (finished) Economy block using last week's Cutting Chart.
You can add an Economy block to so many quilt blocks, and the only thing you need to know is the size of that large centre square. Replace it with an Economy block of that size, and away you go.
But don't stop there! How about adding to the Economy block:

You know I love me a good pinwheel! This is super sweet and a fun way to add a little extra charm to the Economy block- wouldn't this make a lovely Christmas block?
As an example, use the last week's Cutting Chart for a 10" (finished) block and replace the print (A) square with a 5" (finished) Pinwheel block using the Cutting Chart. Voila!

What about a Log Cabin/Economy block combination? You could have lots of fun playing with colour with this block, and it would make a gorgeous scrappy quilt.
As an example, use last week's Cutting Chart for a 12" (finished) Economy block and replace the print (A) square with a 6" (finished) Log Cabin block using the Cutting Chart.

Or add a nine patch! Simple, sweet and a fun way to add some character to the Economy block.
As an example, use last week's Cutting Chart for a 12" (finished) block and replace the print (A) square with a 6" (finished) Nine Patch block using the Cutting Chart.
All you need to know is the size of the Economy block's centre square, and you can replace it with any block of that size. You can use last week's chart but the rule is, the centre square is half the size of the entire block - for a 6" (finished) block the centre finishes at 3", for a 12" (finished) block the centre finishes at 6" etc.
These are just some of the examples I played with and I hope they all show you how valuable the Economy block is to quilt design. At first glance it may not look like anything special, but it really does elevate blocks to a whole new level.
I hope you have fun playing with different combinations and building your own blocks. Next week I'm going to give you some modern variations of the Economy block and some free patterns to try. So fun!


No comments
I hope you enjoyed your visit to my blog. I love hearing from you so thank you for taking the time to leave me a message. 😊